
- -60,02%


Enable Google Analytics + Google Tag Manager on all pages without tracking your own visits. You can exclude any logged in user as well as ignore a device completely by setting a cookie.
Enable Google Analytics + Google Tag Manager on all pages without tracking your own visits. You can exclude any logged in user as well as ignore a device completely by setting a cookie.
• Customer , Guest and Visitor tracking.
• Order Tracking – see stats for each Order to find which Customer order generate the most traffic.
• CMS Tracking – see stats for Prestashop post types to find out which sections are performing the best.
Category Tracking – see stats for your Prestashop categories to find out which sections of your sites are the most popular.
Features
•
• Tags Tracking – see stats for your Prestashop tags to find out which tags are the most popular.
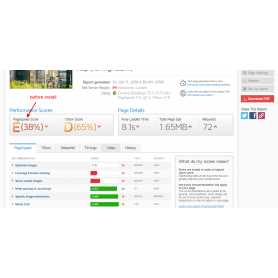
• SEO Score Tracking – see stats for your SEO score and see how it impacts your traffic.
• Focus Keyword Tracking – see stats for focus keyword and see how it correlates with your traffic.
• Logged-in User Tracking – see Prestashop stats for what percentage of your users are logged-in.
• User ID Tracking – see stats for each individual logged-in user’s activity through User ID custom dimension – great for Ecommerce and membership sites.
• Published Time Tracking – track the performance of your posts based on their published time in Google Analytics.
• Customer , Guest and Visitor track
Create a Google Analytics
Create a Google Analytics account and go to module configure and save it and automotice e workingLike Google Tag Manager, you’re going to want to create a Google Analytics account by signing up on the GA page.
Setting Up Google Tag ManagerNow that we are ready to add Google Analytics, the next step is to setup Google Tag Manager.Visit the Google Tag Manager website and sign up using the same Google account you used with Google Analytics.After login you will come to the add new account page. Simply provide a name for your account and click on the continue button. Now you need to add a container to your account. A container could be a website or an app on iOS or Android platforms. In this case we will use the web. You can use your site’s domain for the container name. You can add multiple containers for each account. Once you’re done click on the create button to continue. Google Tag Manager will now create your account with the container, and you will see your container dashboard. It would look something like this: Now your Google Tag Manager account is ready, so the next step is to add a new tag. You can do this by clicking on create new tag.First you will have to choose a tag product. Currently there are 20+ integration templates available.We will choose Google Analytics for now, but you can always add more tags and choose different products according to your needs. You can even click on custom HTML to add any other custom code snippets.
➤ Log-in Admin Panel / Back-Office
➤ Go to Menu: Back-Office >> Modules
➤ Add New Module
➤ Upload zip
➤ Install & Configure
 Sale
Sale Fix Serve Static Content From a Cookieless Domain And Keep-Alive Warning. in...

Alle Checkout-Schritte erscheinen zusammen auf einer einzigen Seite, so dass Kunden jeden...
 Sale
Sale Google Analytics shows you the full customer picture across ads and videos, websites and...
 Neu
Neu 
The Cache warmer module for prestashop is about cache pre-loading. The module helps crawlers...
 Sale
Sale Activate the module for smooth scrolling and smooth "back to top" feature.

This module for PrestaShop allows you to create and send your own newsletters with different...
Accepting payments via credit card, debit card, netbanking or popular mobile wallets for your...

Klarna Checkout is a complete online checkout solution designed to increase sales and customer...


Zeigen Sie die zuletzt angesehenen Produkte des Benutzers auf der Startseite, der Produktseite...
 Sale
Sale Avoid duplicate content and improve your SEO . Using the canonical tag prevents problems...
 Sale
Sale Custom Background Changer is a simple way to change separate background color or image for...
 Sale
Sale PDF Invoice extra fields and extra content on your invoice PDF can arise depending on your...
Ultimate super speed is a great module to install and forget about the page load speed issues...
Enable Google Analytics + Google Tag Manager on all pages without tracking your own visits. You can exclude any logged in user as well as ignore a device completely by setting a cookie.